My Garage
My Account
Cart
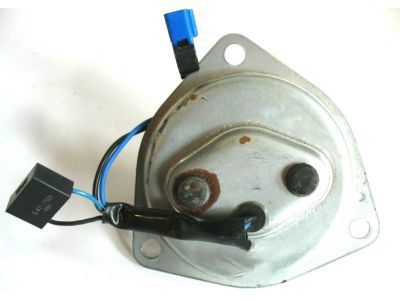
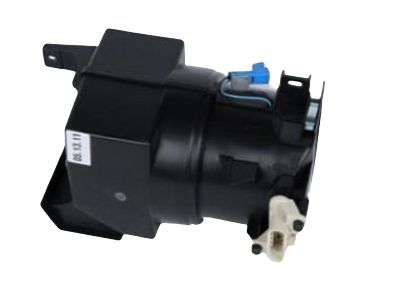
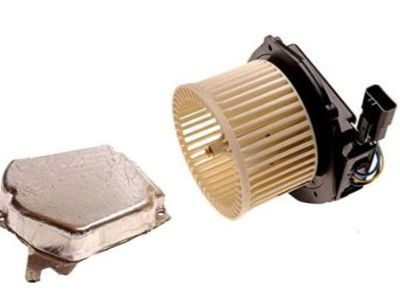
Genuine Cadillac Eldorado Blower Motor
A/C Heater Blower Motor- Select Vehicle by Model
- Select Vehicle by VIN
Select Vehicle by Model
orMake
Model
Year
Select Vehicle by VIN
For the most accurate results, select vehicle by your VIN (Vehicle Identification Number).
7 Blower Motors found
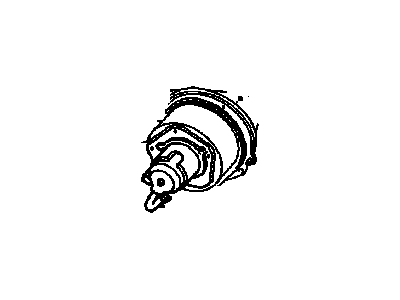
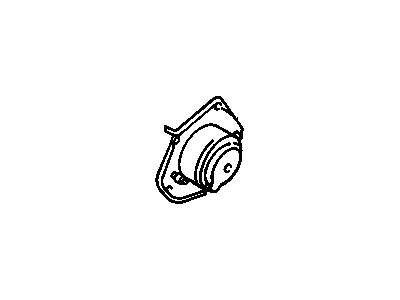
Cadillac Eldorado Blower Motor
The Blower Motor in Cadillac Eldorado vehicles is one of the important parts of the car's HVAC system and its function is to regulate the blower speed for providing some fresh air inside the car. With these blower motor controls, the drivers are able to control the temperature inside the car in as far as the interior heating in the morning to clear the fog or in hot periods to cool the car. The blower motor controls are linked to a module and wiring system hence can be accessed and operated easily. However, problems with the electronic module or wiring can cause some problems and then control over the heating as well as the air conditioning is lost. Any problems with the blower motor controls should be dealt with at the soonest time possible to enhance the comfort level of the driver.
Each OEM Cadillac Eldorado Blower Motor we offer is competitively priced and comes with the assurance of the manufacturer's warranty for the part. Furthermore, we guarantee the speedy delivery of your orders right to your doorstep. Our hassle-free return policy is also in place for your peace of mind.
Cadillac Eldorado Blower Motor Parts Questions & Experts Answers
- Q: What are the different repair procedures for accessing the blower motor on Cadillac ElDorado?A: The location of the blower motor is different every year and varies depending on the trim level of the vehicle. A car with front and rear climate controls might be arranged differently than one with only front controls. The next two repair procedures are not alike. One has to do with where the blower motor is located and accessed through the engine compartment; while another leads us to when it is mounted inside your automobile. For the engine compartment procedure, take off negative battery cable, eliminate cowl cross-tower brace, cut rubber insulator from guidelines and remove metal patch plate beneath. Remove blower motor electrical connector, cooling hose, and screws for mounting. Free blower motor from case. Install a unit that contains blower motor fan, after that plug in blower motor electrical connector, cooling hose as well as mounting screws. Fit on patch plate and seal insulator patch. Replace cowl cross-tower brace then attach negative battery cable back again. Disconnect negative battery cable then remove right-hand instrument panel insulator, detach blower motor electrical connector next remove bolts/screws holding the cover of right-hand body hinge pillar trim panel finally remove cover itself of this part Automatic transmission "A/T" models refer to all Eldorado/Seville which can either be FWD or RWD system incase of Eldorados only; or a transaxle at Sevilles by disconnecting negative battery cable first remove 2 nuts on each side then take off cowl cross-tower brace next take out 2 nuts together with cowl relay center bracket mind you before detaching wiring connector plus cooling tube from blower motor uninstall its mounting screws subsequently extract MAP sensor supporting bracket beforehand turn angle housing aside thereby pick up blade alone away out from it afterward draw out said apparatus above ultimately except put one more thing inside reconnect both hoses wires harness provide them proper orientation tie-down re-position press down bring close fasten nuts on.
Related Cadillac Eldorado Parts
 Cadillac Eldorado A/C Switch
 Cadillac Eldorado A/C Compressor
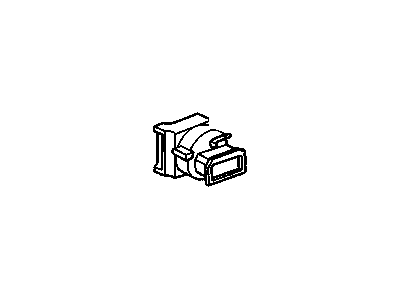
 Cadillac Eldorado Blower Motor Resistor
 Cadillac Eldorado A/C Idler Pulley
 Cadillac Eldorado A/C Condenser Fan
 Cadillac Eldorado A/C Hose
 Cadillac Eldorado Blend Door Actuator
 Cadillac Eldorado A/C Accumulator
 Cadillac Eldorado A/C Clutch
 Cadillac Eldorado Evaporator