Make sure this part fits your vehicle

Oldsmobile 19352931 Module Asm,Electronic Ignition Control (W/O Coil)

1996-2001 Oldsmobile Bravada

GM 19352931 Module Asm,Electronic Ignition Control (W/O Coil)
  • Part Description
    MODULE ASM,ELEK IGN CONT (W/O COIL)
  • Replaces
    10482803, 16201599
  • Manufacturer
    General Motors
Customer Questions & Answers
$125.17 MSRP: $262.96
You Save: $137.79 (53%)
1
ADD TO CART
Ships in 1-3 Business Days
  • Product Specifications

    BrandGenuine Oldsmobile
    Manufacturer Part Number19352931
    Part DescriptionMODULE ASM,ELEK IGN CONT (W/O COIL)
    Item Dimensions3.1 x 2.1 x 2.1 inches
    Item Weight0.50 Pounds
    ConditionNew
    Fitment TypeDirect Replacement
    Replaces10482803, 16201599
    ManufacturerGeneral Motors
    SKU19352931
    WarrantyThis genuine GM part is guaranteed by GM's factory warranty.
    Shipping & ReturnShipping Policy Return Policy
    Warning: California’s Proposition 65
  • Vehicle Fitment

    Year Make Model Engine Important vehicle option details
    1996-2001 Oldsmobile Bravada6 Cyl 4.3LBRAVADA

Customer Questions & Answers

Q:
I am wonder if this is complete and correct part for my vehicle. Posted by GMPartsGiant Specialist
A:
You can Select Your Vehicle to check if 19352931 fits your vehicle.
Posted by GMPartsGiant Specialist
Q:
How to check or replace the module without removing the distributor for Chevrolet Astro? Posted by Customer
A:
Without removing the distributor, you can check or replace the Ignition Control Module by first disconnecting the tachometer lead (if equipped) at the distributor and then checking for a spark at coil and spark plug wires. The distributor cap must be removed if there is no spark detected, and in addition to this remove also Ignition Control Module from the distributor while leaving the connector plugged in. With ignition switch turned On, check voltage on positive terminal of Ignition Control module; if it reads below ten volts wire fault may exist between terminal positive of Ignition Control module and positive ignition coil connector or primary circuit of ignition coil to ignition switch. If it reads above ten volts, examine "C" terminal of Ignition Control Module; if it measures less than one volt problem could occur with distribution-to-coil "C" terminal connection, an open primary circuit in the coil itself, or an issue with an ignition coil. New Ignition Control Module should substitute any old one that shows readings between 1V-10V followed by successful sparking during testing conditions because faulty equipment was replaced. For example, lack of spark indicates problems with ignition coils. To continue, unplug pick-up coil connector from Ignition Control Module while observing voltage reading as test light is momentarily connected between battery positive terminal and "P" terminal on Ignition Control module for less than five seconds when ignition switch is ON. If there is no drop in voltage go ahead to check ground for Ignition Control Module and upon confirmation that it's good replace old unit with new one only after which you may proceed unless otherwise specified hereinafter. If so, test light must be pulled out from "P" as well as change over to high speed aerodynamics affecting water drag coefficient let alone pick-up coils being either defective or not grounded properly resulting into inability get necessary power supply required generating electrical signals across switch contacts reliably throughout its lifespan without having any side effects whatsoever. Disconnecting the battery's negative terminal is important first step when replacing Ignition Control Module. Taking off distributor cap and rotor, unscrewing both Ignition Control Module attaching screws and then lifting Ignition Control Module off distributor is another way of doing this. Electrical leads from Ignition Control Module should be disconnected in a manner that ensures they are not interchanged between each other. Avoid wiping grease off Ignition Control Module or distributors base if same one is being reused. If new IC module is used, apply silicone grease provided with it on its face as well as distributor base where IC module seats for heat dissipation purposes receiving these instructions constantly throughout this article they will always be given directions needed no matter what context may require them ensuring process runs smoothly without any issues arising at any time while trying solve problems related to automobile maintenance such as faulty fuel-injector relay etc. As you finish this work, fit the Ignition control module into place, connect both electrical leads, install the distributor cap with rotor and lastly reconnect the negative terminal of the battery.
Posted by GMPartsGiant Specialist
Q:
How do I perform a check and remove the Enhanced Distributor Ignition (EDI) System of the 1999 Chevrolet Blazer? Posted by Customer
A:
For EDI System check, examine the crankshaft sensor reference voltage and resistance, and inspect the crankshaft sensor circuit for any issues.
Posted by GMPartsGiant Specialist
See expert answers on similar Ignition Control Module
Q:
How do you replace the ignition module on a Chevrolet C1500 and K1500? Posted by Customer
A:
To replace the ignition control module on a vehicle, start by disconnecting the cable from the negative battery terminal. Then, access the distributor by removing the air filter assembly or the air intake duct and resonator, depending on the system. Next, remove the distributor cap and wires as an assembly, followed by the rotor. Carefully detach the wires from the module terminals and remove the screws to lift out the module. For 1988 through 1995 models, it is not necessary to remove the distributor from the engine. However, for 1996 through 2000 models, the ignition control module can be removed without removing the coil bracket. Once the module is removed, it can be tested with special equipment if there are suspicions of malfunction. To install the new module, apply silicone dielectric grease to the bottom of the ignition control module, as it dissipates heat and prevents overheating. Finally, reconnect the electrical connector and secure the module with mounting screws.
Posted by GMPartsGiant Specialist
Q:
How can you check the resistance of a knock sensor, and what should you do if the resistance is not within the specified range for the 1997 Chevrolet C1500? Posted by Customer
A:
To check the sensor's resistance, disconnect the electrical connector and measure the resistance between the terminal and the engine block. If the resistance is not within the specified range, the knock sensor should be replaced.
Posted by GMPartsGiant Specialist
See expert answers on similar Ignition Control Module
Q:
What should be done after disconnecting the electrical connector from the ignition control module for the 2014 Chevrolet Express? Posted by Customer
A:
After disconnecting the electrical connector, the ignition control module mounting screws should be removed and the module should be removed from the coil/module mounting bracket.
Posted by GMPartsGiant Specialist
See expert answers on similar Ignition Control Module
Q:
What steps should you follow to test the operation of a knock sensor, and what should you look for in the voltage signal while testing for the 1988 Chevrolet K1500? Posted by Customer
A:
To test the sensor's operation, reconnect the connector and use a voltmeter to check for an AC voltage signal while the engine is running. The voltage should increase as the engine speed increases. If no voltage signal is present, the knock sensor should be replaced.
Posted by GMPartsGiant Specialist
See expert answers on similar Ignition Control Module
Q:
How do I perform a diagnostic check and maintenance on Ignition Control Module for Chevrolet Blazer,S10,GMC Jimmy and Sonoma? Posted by Customer
A:
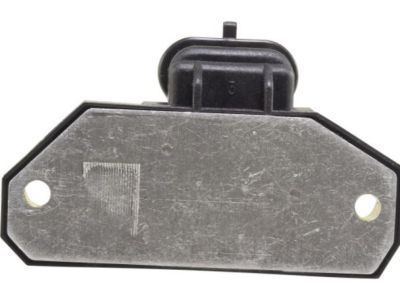
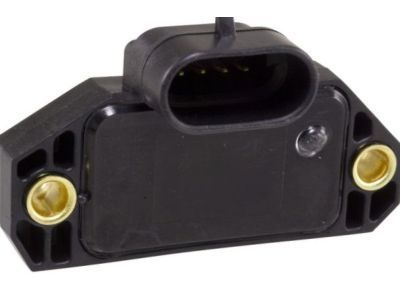
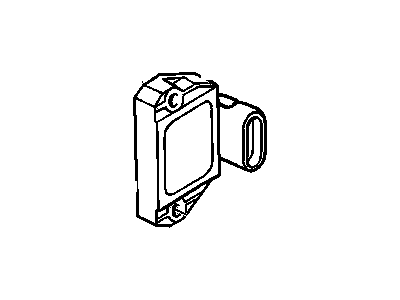
To check the High Energy Ignition System (HEI), start by disconnecting the four-terminal connector from the distributor and test for a spark at the coil using a spark tester connected to the coil wire. If there is a spark, inspect the distributor cap, rotor, and coil wire for any damage or opens. In case there's no spark, remove the distributor cap and reconnect the four-terminal connector to the ignition control module. Unplug the two-wire connector from the distributor and check for voltage at the module positive (+) terminal of the two-wire connector with the ignition switch turned ON. Depending on the reading, follow the diagnostic steps to identify potential faults and replace the faulty components as necessary.For the removal of the distributor, disconnect the negative battery terminal, remove the distributor cap and rotor, and disconnect the electrical connectors from the ignition control module. Remove both module attaching screws and lift the module away from the distributor. If reusing the same module, avoid wiping off the grease from the module or distributor base. For installation, apply silicone grease on the module face and distributor base if using a new module. Install the module, attach both electrical leads, and then reinstall the distributor rotor and cap. Finally, reattach the cable to the negative battery terminal.For Enhanced Distributor Ignition (EDI) System check, examine the crankshaft sensor reference voltage and resistance, and inspect the crankshaft sensor circuit for any issues. To remove the EDI ignition control module, detach the negative battery cable, disconnect the ignition control module electrical connector, remove both module attaching screws, and lift the module from its mount. For installation, secure the module with screws and plug in the electrical connector. Reattach the cable to the negative terminal of the battery.For Distributorless Ignition System (DIS) check, perform the ignition system checks first. Then, disconnect the two-wire electrical connectors from the ignition control module and verify battery voltage on the pink wire. Check the resistance of the crankshaft sensor and circuit. Also, check the output voltage signal from the crankshaft sensor. If all the tests pass but there is no spark output at any of the coils, the ignition control module may be defective. If any system check findings are incorrect, diagnose the individual circuits and components.To remove the DIS system, detach the negative battery cable, label and disconnect all spark plug wires from the DIS assembly, unplug the electrical connector at the module, and remove the DIS and support bracket assembly. Unbolt and separate the coil and module assemblies, then detach the wires between the module and coil assemblies from the spade terminals on the underside of the coils. Unbolt the module from the support bracket. Installation is the reverse of removal, ensuring the wires are attached to the new module's coil assembly spade terminals in the same order as removed.
Posted by GMPartsGiant Specialist
If you have any questions about this product, please don't hesitate to ask us. We will be happy to help you!

Genuine GM Part 19352931, the Right Choice

Your vehicle deserves only genuine OEM GM parts and accessories. To ensure reliability, purchase GM part # 19352931 Module Asm,Electronic Ignition Control (W/O Coil). It is sometimes referred to as Oldsmobile Igniter, Oldsmobile Ignition Control Module. Our GM parts and accessories are expedited directly from authorized GM dealers strategically located all across the U.S. and are backed by the manufacturer's 12 month, 12,000 mile warranty. OEM GM parts are the best for restoring your vehicle to factory condition performance. This part fits specific Oldsmobile Bravada models.

Affordable, reliable and built to last, GM part # 19352931 Module Asm,Electronic Ignition Control (W/O Coil) stands out as the smart option. GMPartsGiant.com is your prime online source with the biggest and best selection of genuine GM parts and accessories at giant discounted prices. We have the OEM GM parts and accessories you need at the wholesale prices. GMPartsGiant.com has you covered no matter what type of GM vehicle you drive. For detailed Oldsmobile parts information, click here.

Why choose GM Parts Giant

  • Dedicated Service

    Your complete satisfaction is our #1 goal

  • Lowest Prices

    Best deals on genuine OE parts from dealerships

  • Fast Delivery

    Orders are processed and delivered promptly