My Garage
My Account
Cart
Genuine Chevrolet Corvette Antenna
Radio Antenna- Select Vehicle by Model
- Select Vehicle by VIN
Select Vehicle by Model
orChevrolet
Corvette
Year
Select Vehicle by VIN
For the most accurate results, select vehicle by your VIN (Vehicle Identification Number).
50 Antennas found
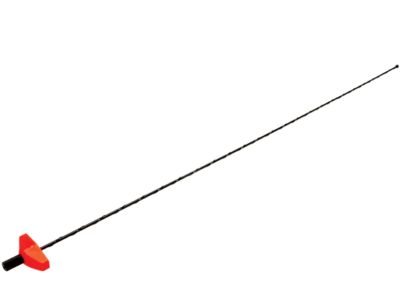
Chevrolet Corvette Antenna,Radio
Part Number: 15087886$56.76 MSRP: $112.62You Save: $55.86 (50%)Ships in 1-3 Business Days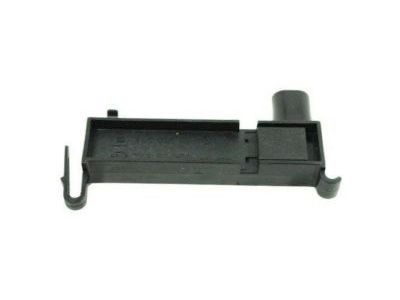
Chevrolet Corvette Antenna Assembly, Ignition Lock Key Transmitter
Part Number: 13502549$19.91 MSRP: $37.55You Save: $17.64 (47%)Ships in 1-2 Business Days
Chevrolet Corvette Antenna Assembly, Wireless Communicate Interface
Part Number: 15938939$35.39 MSRP: $66.80You Save: $31.41 (48%)Ships in 1-2 Business Days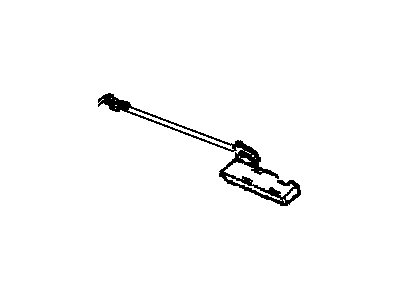
Chevrolet Corvette Antenna Assembly, Mobile Telephone & Vehicle Locating
Part Number: 22830110$35.19 MSRP: $99.79You Save: $64.60 (65%)Ships in 1-2 Business Days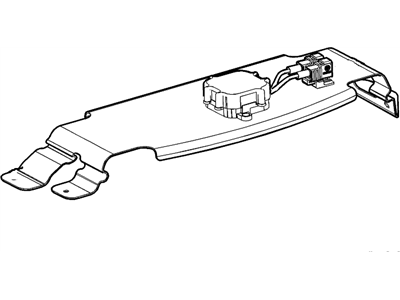
Chevrolet Corvette Antenna Assembly, Radio Digital Eccn=5A991
Part Number: 22933186$97.86 MSRP: $184.64You Save: $86.78 (47%)Ships in 1-2 Business DaysChevrolet Corvette Antenna Assembly, Radio Digital Eccn=5A991
Part Number: 22779660$117.18 MSRP: $213.08You Save: $95.90 (46%)Ships in 1-2 Business Days
Chevrolet Corvette Antenna Assembly, Radio
Part Number: 10321835$28.31 MSRP: $53.42You Save: $25.11 (47%)Ships in 1-2 Business Days
Chevrolet Corvette Antenna Assembly, Mobile Telephone & Vehicle Locating Eccn=5A991
Part Number: 84156073$63.84 MSRP: $120.48You Save: $56.64 (48%)Ships in 1-2 Business DaysChevrolet Corvette Antenna Assembly, Mobile Telephone & Vehicle Locating Eccn=5A991
Part Number: 23291200$639.02 MSRP: $1205.71You Save: $566.69 (47%)Ships in 1-2 Business Days
Chevrolet Corvette Antenna Assembly, Radio Eccn = 5A991
Part Number: 23182588$26.28 MSRP: $49.55You Save: $23.27 (47%)Ships in 1-2 Business DaysChevrolet Corvette Antenna Assembly, Radio Digital Eccn=5A991
Part Number: 22924487$135.76 MSRP: $246.87You Save: $111.11 (46%)Ships in 1-2 Business Days
Chevrolet Corvette Antenna Assembly, Mobile Telephone & Vehicle Locating Eccn=5A991
Part Number: 84156075$83.44 MSRP: $157.44You Save: $74.00 (47%)Ships in 1-2 Business Days
Chevrolet Corvette Antenna Assembly, Digital Radio Transceiver Module
Part Number: 84304857$98.65 MSRP: $179.38You Save: $80.73 (46%)Ships in 1-2 Business DaysChevrolet Corvette Antenna Asm,Mobile Telephone & Telematics Eccn=5A991
Part Number: 22964579$39.35 MSRP: $74.23You Save: $34.88 (47%)Ships in 1-2 Business DaysChevrolet Corvette Antenna Assembly, Mobile Telephone & Vehicle Locating Eccn=5A991
Part Number: 23279094$61.75 MSRP: $112.27You Save: $50.52 (45%)Ships in 1-2 Business Days
Chevrolet Corvette Antenna Assembly, Digital Radio Transceiver Module
Part Number: 23361418$102.94 MSRP: $194.25You Save: $91.31 (48%)Ships in 1-2 Business DaysChevrolet Corvette Antenna Assembly, Mobile Telephone & Telematics Eccn=5A991
Part Number: 23291202$468.63 MSRP: $852.05You Save: $383.42 (45%)Ships in 1-2 Business DaysChevrolet Corvette Antenna Assembly, M/Tel & Veh Loc Eccn=5A991
Part Number: 84388996$656.73 MSRP: $1194.07You Save: $537.34 (45%)Ships in 1-2 Business Days
Chevrolet Corvette ANTENNA ASM-HIGH FREQ ECCN=5A991
Part Number: 85547220$117.14 MSRP: $211.07You Save: $93.93 (45%)Ships in 1-3 Business Days
Chevrolet Corvette ANTENNA ASM-LOW FREQ I/P ECCN=5A991
Part Number: 13546098$89.58 MSRP: $160.68You Save: $71.10 (45%)Ships in 1-3 Business Days
| Page 1 of 3 |Next >
1-20 of 50 Results
Chevrolet Corvette Antenna
Each OEM Chevrolet Corvette Antenna we offer is competitively priced and comes with the assurance of the manufacturer's warranty for the part. Furthermore, we guarantee the speedy delivery of your orders right to your doorstep. Our hassle-free return policy is also in place for your peace of mind.
Chevrolet Corvette Antenna Parts Questions & Experts Answers
- Q: How do you replace a fixed mast antenna on Chevrolet Corvette?A: To replace the fixed mast antenna first unbolt the negative terminal of the battery. Wearing a suitable tool, with the tape or rag to protect the finish, remove the mast from the mast base and lift the rear deck lid. First, the passenger side deck lid inner trim panel is removed simply by pulling on the edges of the panel in order to release its clips; the carpet may then be rolled back and the convenience net plastic hooks unscrewed. Move the passenger side edge of the right rear carpet trim panel back, remove the cargo light fixture leads and the antenna coaxial cable from inside the wheel housing. Remove the passenger side tail lamp assembly and disconnect the antenna coaxial cable from the quick disconnect and disconnect the remaining antenna ground lead from the body harness. Take off the nut that locks the braided ground strap to the antenna, the screws fixing the antenna bracket, and, finally, gently extrude the rubber gasket from the wheel well. The antenna assembly can be withdrawn through the tail light fixture aperture in the body rear, with the procedure of installation being exactly the opposite of this. In the case of roof mounted unit, remove the rear window trim panel gently, remove the headliner plastic screws and detach the rear portion of the headliner to view the antenna-base nut which you have to loosen to remove the antenna from the roof exterior. Release the electrical connector and the antenna cable harness connectors, and detach the base and the harness from the roof, while the reversing process is the same as the foregoing. On adaptable units, shed the negative terminal of the battery, unscrew the trim panel of the trunk lid, detach the electrical connectors and the Antenna cable harness connectors, remove the base and the harness of the trunk lid and put the Antenna base harness through the hole while reassembling. For power antenna removal it should be understood that only the mast is accessible for servicing by use of a special socket for the mast retaining nut. Perform the same action as when removing the electrical connector of a fixed mast antenna and vice versa, for installation. The following needs to be done to get to the antenna module: the negative battery terminal need to be disconnected and the door sill plate and pillar trim on the passengers side have to be removed, the audio and coaxial cables have to be disconnected from the module, the screws that attached it to the lock pillar have to be unscrewed and the module needed to be and then it is reversed. The antenna cable consists of two cables: with the rear cable lying down the center of the rear ward, and going up the right C-pillar then passing through to the left front part of the car to join the front wire running up from the radio. If a cable has to be removed, then it is only disconnected at both ends and left in the system during connection of a new one. To get to the rear antenna cable look behind the back seat cushion, right C-pillar, front and rear door sills, front passenger seat, carpeting and right kick panel and then unplug the cable from the antenna module and the front cable before installing the new cable. In order to get to the front antenna cable you will need to remove the right kick panel, glove box and radio After you have done that you will need to disconnect the front antenna cable from the radio and the rear antenna cable and after than you will be able to install the new cable.
Related Chevrolet Corvette Parts

Browse by Year
2024 Antenna 2023 Antenna 2022 Antenna 2021 Antenna 2020 Antenna 2019 Antenna 2018 Antenna 2017 Antenna 2016 Antenna 2015 Antenna 2014 Antenna 2013 Antenna 2012 Antenna 2011 Antenna 2010 Antenna 2009 Antenna 2008 Antenna 2007 Antenna 2006 Antenna 2005 Antenna 2004 Antenna 2003 Antenna 2002 Antenna 2001 Antenna 2000 Antenna 1999 Antenna 1998 Antenna 1996 Antenna 1995 Antenna 1994 Antenna 1993 Antenna 1992 Antenna 1991 Antenna 1990 Antenna 1989 Antenna 1988 Antenna 1987 Antenna 1986 Antenna 1985 Antenna 1984 Antenna