My Garage
My Account
Cart
Genuine Cadillac Escalade Transmission Assembly
Trans Assembly- Select Vehicle by Model
- Select Vehicle by VIN
Select Vehicle by Model
orMake
Model
Year
Select Vehicle by VIN
For the most accurate results, select vehicle by your VIN (Vehicle Identification Number).
105 Transmission Assemblies found

Cadillac Escalade Transmission Assembly, Auto (1Xml)
Part Number: 24289597$2325.60 MSRP: $2535.75You Save: $210.15 (9%)Ships in 1-3 Business DaysCadillac Escalade Transmission Assembly, Auto9(Ujl)
Part Number: 24284223$3656.20 MSRP: $4017.20You Save: $361.00 (9%)Ships in 1-3 Business Days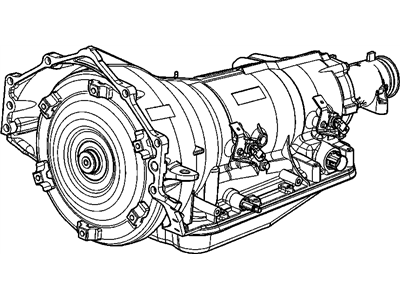
Cadillac Escalade Transmission Asm,Auto (07Mcp) (Goodwrench Remanufacture)
Part Number: 19180256$3576.76 MSRP: $4029.48You Save: $452.72 (12%)Ships in 1-3 Business DaysCadillac Escalade TRANSMISSION ASM,AUTO 11CKA (SERV REMAN)
Part Number: 19431743$3926.00 MSRP: $4393.66You Save: $467.66 (11%)Ships in 1-3 Business DaysCadillac Escalade TRANSMISSION ASM,AUTO 13CKA (SERV REMAN)
Part Number: 19431742$3939.28 MSRP: $4408.69You Save: $469.41 (11%)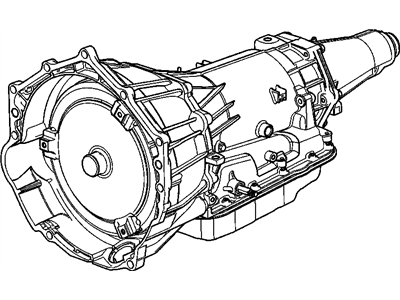
Cadillac Escalade Transmission,Auto(Goodwrench Remanufacture)
Part Number: 24229175$2812.87 MSRP: $3165.35You Save: $352.48 (12%)Ships in 1-3 Business DaysCadillac Escalade TRANSMISSION ASM,AUTO 08CKA (SERV REMAN)
Part Number: 19431748$4279.85 MSRP: $4793.95You Save: $514.10 (11%)Ships in 1-3 Business DaysCadillac Escalade Transmission Assembly, Auto (1Cfj)
Part Number: 24045929$4018.09 MSRP: $4426.58You Save: $408.49 (10%)Ships in 1-3 Business DaysCadillac Escalade TRANSMISSION ASM,AUTO 07CJA (SERV REMAN)
Part Number: 19431747$4288.10 MSRP: $4815.16You Save: $527.06 (11%)Ships in 1-3 Business DaysCadillac Escalade TRANSMISSION ASM-AUTO (2CKJ)
Part Number: 24297326$2291.45 MSRP: $2473.36You Save: $181.91 (8%)Ships in 1-3 Business DaysCadillac Escalade Transmission,Auto(Goodwrench Remanufacture)
Part Number: 24225963$2812.41 MSRP: $3164.83You Save: $352.42 (12%)Ships in 1-3 Business DaysCadillac Escalade TRANSMISSION ASM,AUTO (REMAN 86KJ)
Part Number: 19367423$4054.51 MSRP: $4467.78You Save: $413.27 (10%)Ships in 1-3 Business DaysCadillac Escalade Transmission,Auto(Goodwrench Remanufacture) (4Kcd)
Part Number: 12491894$2812.87 MSRP: $3165.35You Save: $352.48 (12%)Ships in 1-3 Business DaysCadillac Escalade TRANSMISSION ASM-AUTO (3CNJ)
Part Number: 24297328$2323.97 MSRP: $2510.15You Save: $186.18 (8%)Ships in 1-3 Business DaysCadillac Escalade Transmission,Auto(Goodwrench Remanufacture)(6Kcd)
Part Number: 89037492$2912.31 MSRP: $3277.84You Save: $365.53 (12%)Ships in 1-3 Business DaysCadillac Escalade TRANSMISSION ASM,AUTO (REMAN 06KJ)
Part Number: 19367425$4027.04 MSRP: $4436.69You Save: $409.65 (10%)Cadillac Escalade TRANSMISSION ASM,AUTO 10CJA (SERV REMAN)
Part Number: 19431746$4230.10 MSRP: $4737.68You Save: $507.58 (11%)Ships in 1-3 Business DaysCadillac Escalade Transmission Assembly, Auto (1Crj)
Part Number: 24045928$4020.59 MSRP: $4429.40You Save: $408.81 (10%)Ships in 1-3 Business DaysCadillac Escalade TRANSMISSION ASM,AUTO 13CCA (SERV REMAN)
Part Number: 19431744$3896.84 MSRP: $4360.68You Save: $463.84 (11%)Ships in 1-3 Business DaysCadillac Escalade TRANSMISSION ASM,AUTO (REMAN)
Part Number: 19434868$4559.73 MSRP: $5086.80You Save: $527.07 (11%)
| Page 1 of 6 |Next >
1-20 of 105 Results
Cadillac Escalade Transmission Assembly
Each OEM Cadillac Escalade Transmission Assembly we offer is competitively priced and comes with the assurance of the manufacturer's warranty for the part. Furthermore, we guarantee the speedy delivery of your orders right to your doorstep. Our hassle-free return policy is also in place for your peace of mind.
Cadillac Escalade Transmission Assembly Parts Questions & Experts Answers
- Q: How should the transmission and torque converter be removed and reinstalled on Cadillac Escalade?A: The converter driveplate, pump bushing, and oil seal are best changed as a complete unit, the transmission and torque converter cannot be successfully separated as such. Start with the detachment of the negative battery terminal, followed by lift of the car using jack stands, and removal of any pans or trays in the under part of the car. No longer circulate the old transmission fluid and do away with exhaust parts that hinder its elimination. Locate the relation between the torque converter and driveplate using the inspection plug hole, also remove the starter motor and the bell housing covers. Remove the torque converter to drive plate bolts, lift the transmission with the jack and remove the mounts and cross member bolts. Lower the transmission slightly for access to the components, remove the Shift Cable, electrical connectors, heat shield and the fuel line bracket. Remove the transmission cooler lines, the bolt screwing into the fill/dipstick tube, and if necessary the transfer case. Support the engine, unbolt the transmission to the engine and lock the torque converter with the locking pliers so that it doesn't fall off. To install make sure that the torque converter is well locked into the pump, lift the transmission above and make sure the holes in the torque converter line up with the driveplate holes. Slide the transmission forward until it is fully mated, reinstall the dipstick tube, replace the transmission to engine bolts, and reinstall the crossmember. Check and reconnect the torque converter to driveplate bolts, reinsert the starter motor and check that the retaining rings are correctly fitted in quick connect fittings. Some of the tasks that are followed in the process include connecting the transmission fluid cooler lines, plugging of electrical connectors and the installation of heat shield. Engage the shift cable, replace the torque converter inspection cover, and if necessary replace the transfer case, and driveshafts. Last, reposition the shift cable, returned all removed exhaust parts, reduce height of the vehicle, and fill the transmission with the called type of the fluid and start the engine for one hour or more to make sure that there is no leakage.
Related Cadillac Escalade Parts
 Cadillac Escalade Torque Converter
 Cadillac Escalade Valve Body
 Cadillac Escalade Transmission Pan
 Cadillac Escalade Transmission Gasket
 Cadillac Escalade Transmission Oil Cooler
Browse by Year
2024 Transmission Assembly 2023 Transmission Assembly 2022 Transmission Assembly 2021 Transmission Assembly 2020 Transmission Assembly 2019 Transmission Assembly 2018 Transmission Assembly 2017 Transmission Assembly 2016 Transmission Assembly 2015 Transmission Assembly 2014 Transmission Assembly 2013 Transmission Assembly 2012 Transmission Assembly 2011 Transmission Assembly 2010 Transmission Assembly 2009 Transmission Assembly 2008 Transmission Assembly 2007 Transmission Assembly 2006 Transmission Assembly 2005 Transmission Assembly 2004 Transmission Assembly 2003 Transmission Assembly 2002 Transmission Assembly 2000 Transmission Assembly 1999 Transmission Assembly